- When you create a virtual machine on the Azure portal, it comes with the OS disk as shown below. It is necessary to add a data disk to the VM to have space to work with.
To check the disk attached to the VM, go to the disk tab in the VM and you will observe that only the OS disk is attached by default.
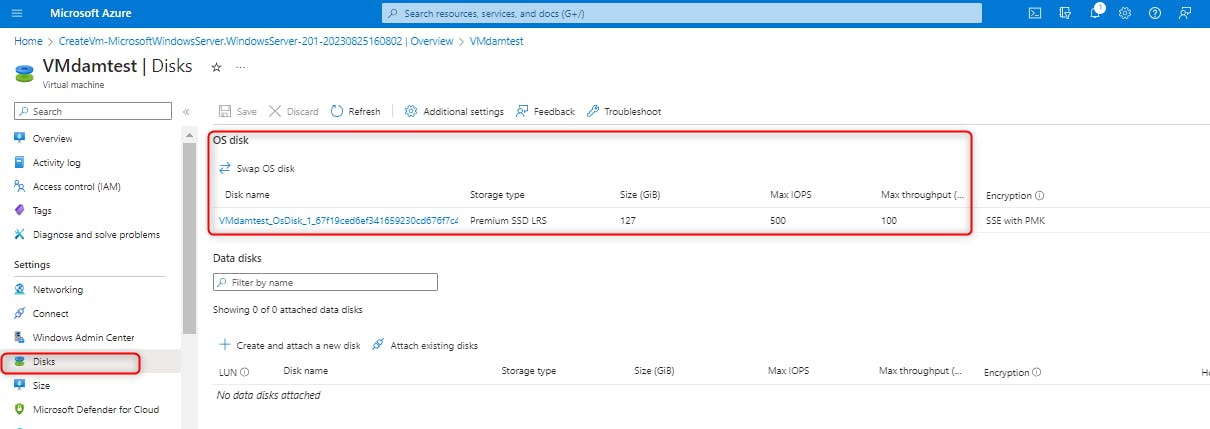
To create a Data Disk, click on "Create and attach a new disk"
Input the specification you want for the disk and click on save

The next step is to add the specified disk to the virtual machine and enable it for use.
Remote desktop into the machine and check the disk-enabled in the virtual machine. You will observe that the 64gb disk created in the Azure portal is not present in the virtual machine.
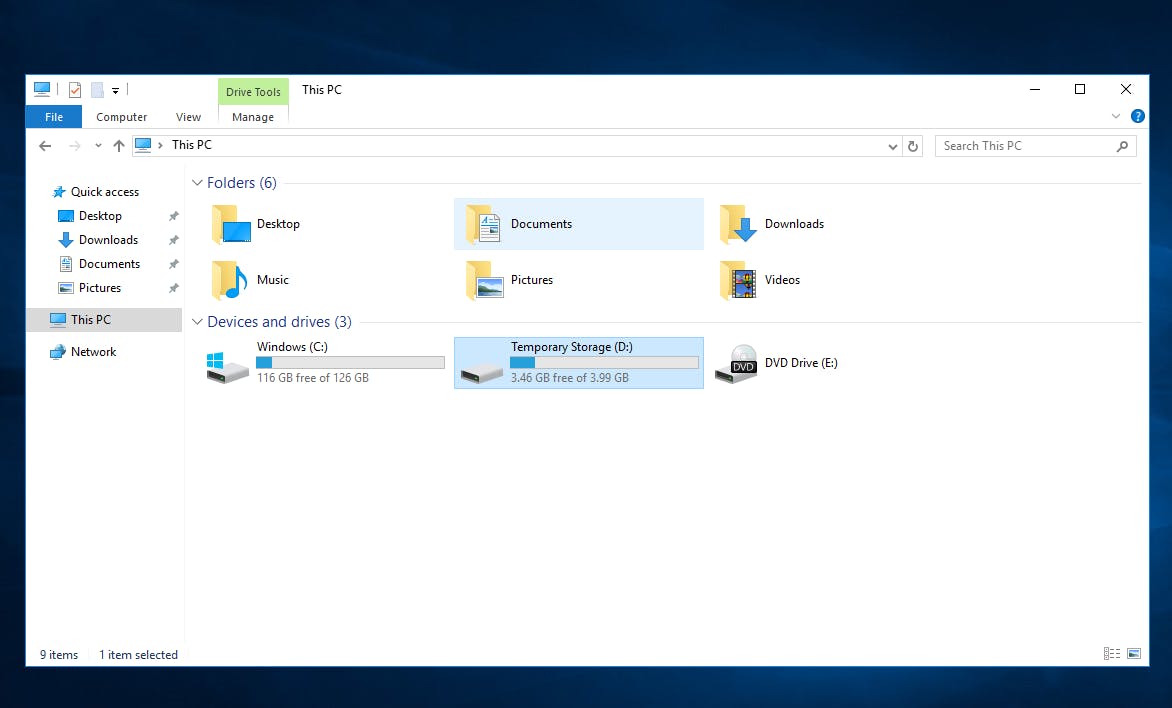
To enable this disk follow the steps below:
In the search tab go to "Create and format hard disk partition"
Click OK
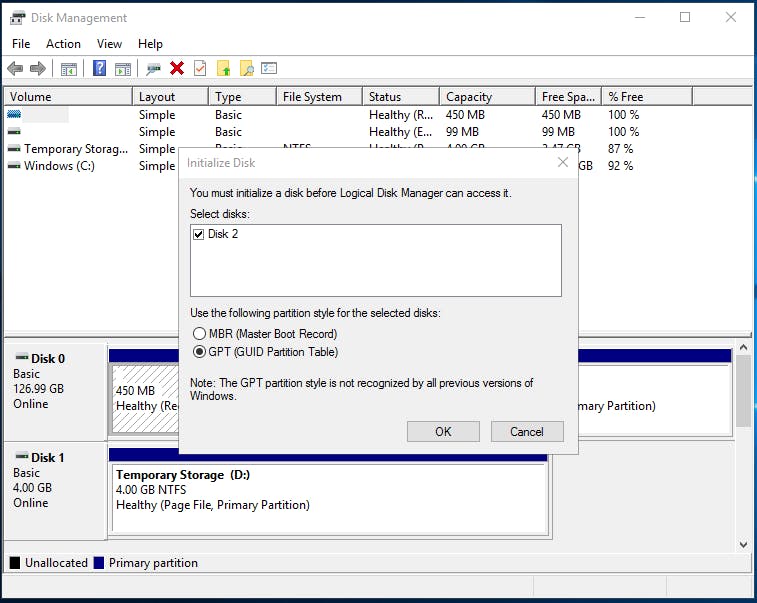
Check for the 64gb data disk and observe it is unallocated.
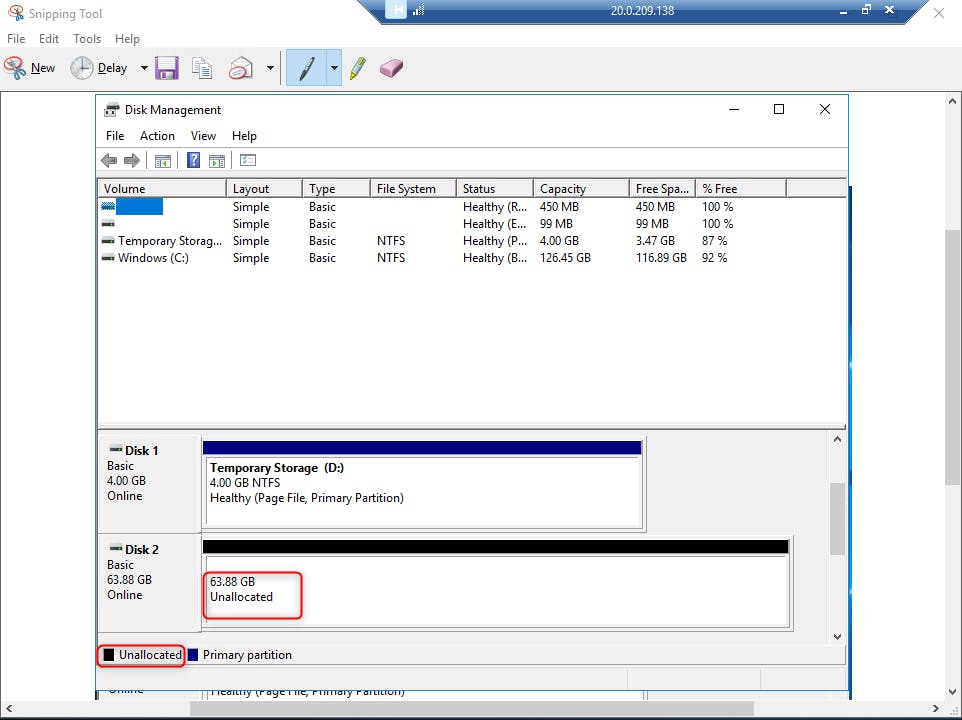
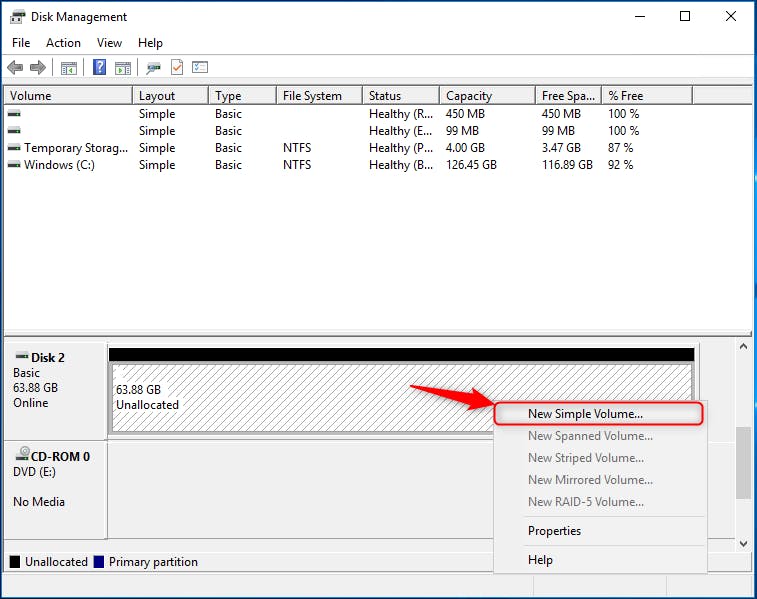
Right-click on the unallocated disk and click on "New Simple Volume"
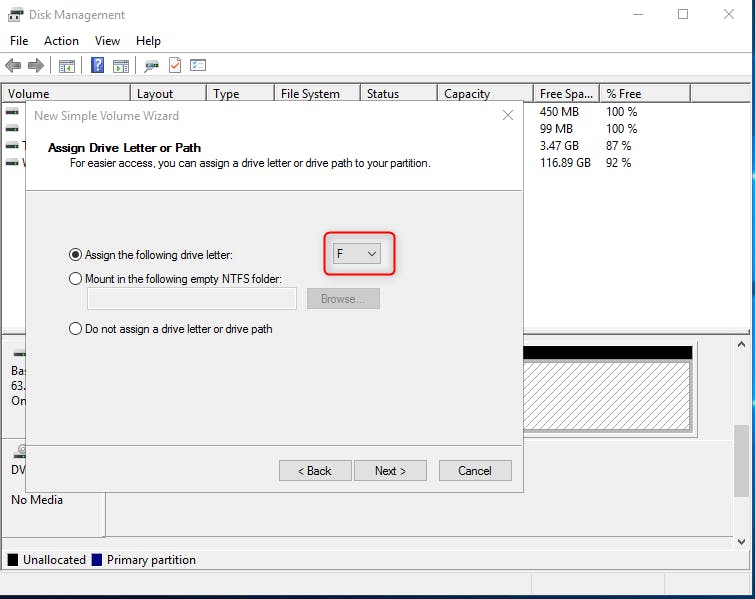
Follow all the steps and specify the drive you want to keep the data disk.
Ensure you perform a quick format and also verify that the data disk is enabled.
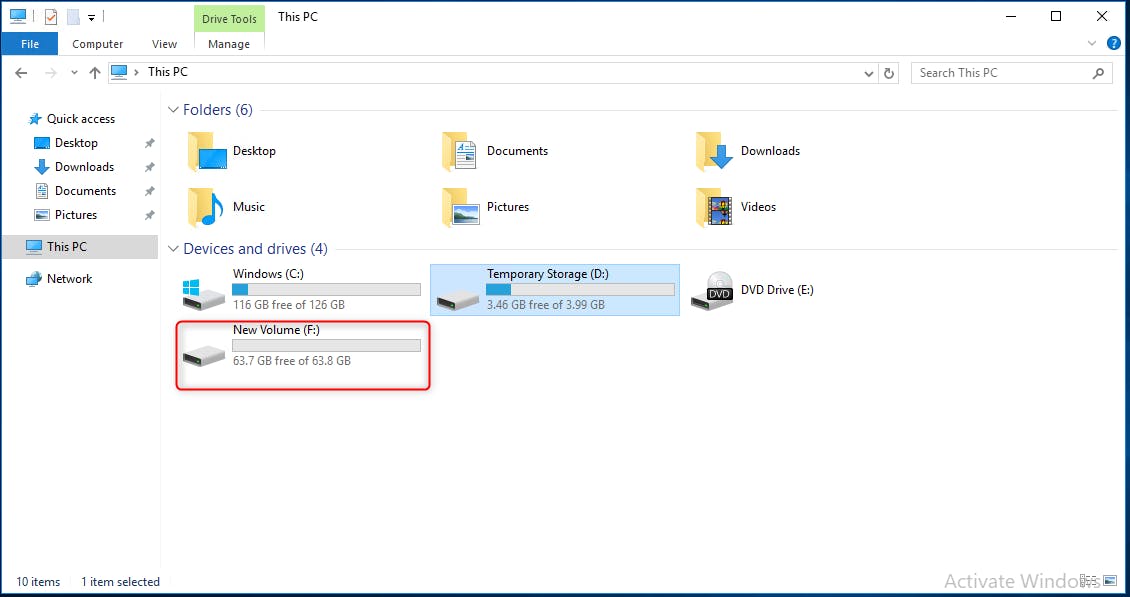
The F drive for the data disk is now ready to be used on the virtual machine.
